05 Nov 2022
A Deep Dive into Disk Image Manipulation
When deploying Raspberry Pi clusters for Kubernetes or other distributed systems, manual
configuration quickly becomes tedious. Cloud-init offers an elegant solution for automated
provisioning, but Raspberry Pi OS doesn’t include it by default.
This article explores a script that modifies Raspberry Pi OS images to install cloud-init, providing
detailed explanations of the low-level Linux tools that make this magic possible.
Prerequisites and Setup
In this setup, Ubuntu 22.04 x86 is running on the host.
Before diving into the script, you’ll need several tools installed on your host system:
The tools provide the following functionality:
qemu-utils: Provides disk image manipulation tools, particularly qemu-img for resizing imagesqemu-user-static: Enables execution of ARM binaries on x86 systems through binary translation,
allowing us to chroot into ARM filesystemsbinfmt-support: Registers binary formats with the kernel, enabling automatic detection and
execution of ARM binaries via QEMUjq: a command-line tool for parsing, filtering, and transforming JSON data.xz-utils: Handles XZ-compressed files (the format Raspberry Pi OS images use)cloud-utils: Provides cloud image utilitiesutil-linux: Contains essential system utilities like losetup, mount, and sfdisk
Finally, restarting systemd-binfmt.service ensures the kernel recognizes ARM binary formats immediately.
# install packages
sudo apt-get install -qy \
    binfmt-support \
    cloud-utils \
    jq \
    qemu-user-static \
    qemu-utils \
    util-linux
    xz-utils \

# start systemd-binfmt service
sudo systemctl restart systemd-binfmt.service
Download Raspberry Pi OS
Download the Raspberry Pi OS disk image using curl.
curl -sfSLO https://downloads.raspberrypi.org/raspios_lite_arm64/images/raspios_lite_arm64-2022-04-07/2022-04-04-raspios-bullseye-arm64-lite.img.xz
The 2022-04-04-raspios-bullseye-arm64-lite.img.xz file is compressed using xz.
Checkout the index for all available images.
Phase 1: Image Decompression and Preparation
image=2022-04-04-raspios-bullseye-arm64-lite.img.xz
xz --decompress --keep $image.img.xz
mv $image.img $image-cloudinit.img
The script decompresses the XZ-compressed disk image, and renames it to indicate it will contain
cloud-init. The --keep flag preserves the original compressed file.
Phase 2: Expanding the Disk Image
Raspberry Pi OS images are minimal by default. Installing cloud-init and later software like K3s
requires additional space. This is where disk image manipulation becomes crucial.
Using qemu-img for Non-Destructive Expansion
qemu-img resize -f raw $image-cloudinit.img +1G
qemu-img is QEMU’s Swiss Army knife for disk images. The resize command extends the image file
by 1GB without touching existing data.
At this point, the image file is larger, but the partition table and filesystem don’t know about the
extra space yet.
Phase 3: Partition Manipulation with Loopback Devices
Inspect the disk image
Use fdisk to inspect the contents of the disk image.
fdisk -l $image-cloudinit.img
The output shows that there are two partitions. We want to extend the second partition, since it is the
root filesystem where Raspberry Pi OS is installed.
Disk 2022-04-04-raspios-bullseye-arm64-lite.img: 1.86 GiB, 2000683008 bytes, 3907584 sectors
Units: sectors of 1 * 512 = 512 bytes
Sector size (logical/physical): 512 bytes / 512 bytes
I/O size (minimum/optimal): 512 bytes / 512 bytes
Disklabel type: dos
Disk identifier: 0x0ee3e8a8

Device                                      Boot  Start     End Sectors  Size Id Type
2022-04-04-raspios-bullseye-arm64-lite.img1        8192  532479  524288  256M  c W95 FAT32 (LBA)
2022-04-04-raspios-bullseye-arm64-lite.img2      532480 3907583 3375104  1.6G 83 Linux
Create a Loopback Device
device=$(sudo losetup --show --find --partscan $image-cloudinit.img)
losetup creates loopback devices, which make files appear as block devices to the system. This is
essential because partition tools expect to work with devices like /dev/sda, not regular files.
The flags do the following:
--show: Prints the assigned device name (e.g., /dev/loop0)--find: Automatically finds an unused loopback device--partscan: Scans for partitions and creates sub-devices (e.g., /dev/loop0p1, /dev/loop0p2)
Now our image file appears as a real disk to Linux, complete with accessible partitions.
Resizing the Partition with parted
parted is a partition editor that can modify partition tables on both real disks and loopback
devices. The command resizepart 2 100% extends partition 2 (the root filesystem) to use all
available space on the disk.
This updates the partition table but doesn’t yet resize the filesystem itself.
sudo parted $device resizepart 2 100%
Phase 4: Filesystem Checking and Resizing
Ensuring Filesystem Integrity with e2fsck
e2fsck is a checker and repair tool for ext2/ext3/ext4 filesystems. The -f flag forces a
check even if the filesystem appears clean. This is critical before resizing because any corruption
could be magnified during the resize operation, potentially causing data loss.
Appending p2 to the device name gives the second partition.
device_part="${device}p2"
sudo e2fsck -f $device_part
Expanding the Filesystem with resize2fs
resize2fs resizes the filesystem. Without size arguments, it expands the filesystem to fill the
entire partition.
This is the final step that makes the added space actually usable within the filesystem.
sudo resize2fs $device_part
Cleanup
Detach the loopback device to releasing system resources. Always detach loopback devices when
finished to prevent resource leaks.
Phase 5: Mounting and Chroot Environment Setup
Calculating Partition Offsets
The fdisk -l command output above, shows the sizes and offsets of each partition within the disk image.
This steps calculates the offset of the second partition, which starts at 532480, so that it can be mounted.
Conveniently, sfdisk dumps partition information in JSON format, so jq can be used to extract
the start sector of the second partition (index 1). Since sectors are 512 bytes, we multiply to get
the byte offset needed for mounting.
start=$(sfdisk --json $image-cloudinit.img | jq '.partitiontable.partitions[1].start')
offset=$(($start * 512))
Mounting the Root Filesystem
Create a temporary directory for mounting the root filesystem partition.
tmpdir=$(mktemp -d)
sudo mount -o loop,rw,sync,offset=$offset $image-cloudinit.img "${tmpdir}"
The mount command with the loop option mounts a file as if it were a block device.
Key options:
rw: Mount read-writesync: Write operations are immediately flushed to disk (safer but slower)offset=$offset: Skip to the specified byte position, starting at the root partition
Bind Mounting System Directories
Bind mounts are required for a successful chroot into the ARM filesystem.
/dev: Device files for hardware access/sys: Kernel and device information/proc: Process and system information
Without these, many programs inside the chroot would fail or behave unpredictably.
sudo mount --bind /dev "${tmpdir}/dev"
sudo mount --bind /sys "${tmpdir}/sys"
sudo mount --bind /proc "${tmpdir}/proc"
Phase 6: Chroot and Cloud-Init Installation
Entering the Chroot Environment
chroot changes the apparent root directory for a process and its children. This creates an
isolated environment where the ARM filesystem appears as /, allowing us to run commands as if we
booted into the Raspberry Pi OS.
sudo chroot "${tmpdir}" /bin/bash --norc --noprofile
The --norc --noprofile flags prevent bash from loading user configuration, ensuring a clean,
predictable environment.
Installing Cloud-Init
Within the chroot, the following commands will install and configure cloud-init. The execution of each
command can be slow, since the ARM64 architecture is being emulated with Qemu.
export DEBIAN_FRONTEND=noninteractive
export DEBCONF_NONINTERACTIVE_SEEN=true

apt-get update -q
apt-get install -qy --no-install-recommends cloud-init
The environment variables prevent interactive prompts during package installation. The
--no-install-recommends flag keeps the installation minimal by skipping suggested packages.
Enabling Cloud-Init Services
systemctl enable creates symlinks so these services start automatically at boot. Cloud-init’s
initialization happens in stages:
cloud-init-local: Runs early, before networking, to configure network interfacescloud-init-network: Waits for network availabilitycloud-init-main: Retrieves user data and runs configurationcloud-config: Executes cloud config modules
systemctl enable cloud-init-local.service
systemctl enable cloud-init-main.service
systemctl enable cloud-init-network.service
systemctl enable cloud-config.service
Disabling Conflicting Services
The userconfig.service performs first-boot user setup, which conflicts with cloud-init’s user
provisioning.
Furthermore, the apt timers are disabled to prevent automatic updates from interfering with
cloud-init’s initial configuration.
systemctl disable userconfig.service
systemctl disable apt-daily.timer
systemctl disable apt-daily-upgrade.timer
Cleanup
These commands remove unnecessary packages and clean package caches, reducing the final image size.
apt-get autoremove -qy
apt-get autoclean
apt-get clean
Exit the chroot
The installation is complete, so you can exit the chroot shell with the exit command or pressing Ctrl+D.
Phase 7: Unmounting and Cleanup
Unmounting must happen in reverse order—first the bind mounts, then the root filesystem. Forgetting
to unmount can lead to filesystem corruption or prevent the loopback device from detaching.
sudo umount "${tmpdir}/dev"
sudo umount "${tmpdir}/sys"
sudo umount "${tmpdir}/proc"
sudo umount "${tmpdir}"
Next Steps
The resulting cloud-init enabled image can be flashed to SD cards, together with the cloud-init
configuration, typically provided with a user-data file within the boot volume, to automatically
provision on first boot.
See the cloud-init documentation
for more information on the configuration.
22 Dec 2020
I thought I’d have some fun in December, setting up a Raspberry Pi cluster for running Kubernetes.
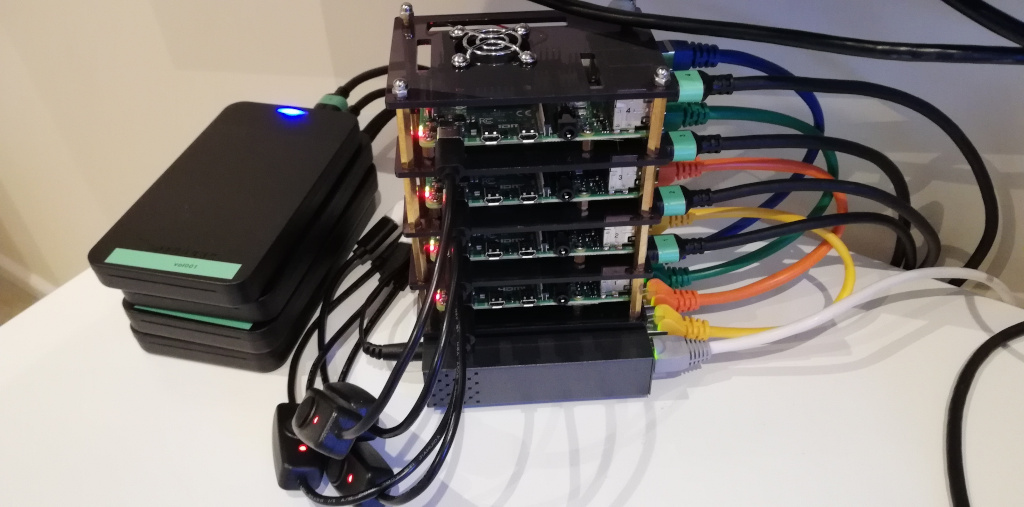
My goal was to automate as much of the process of setting up each node of the cluster as possible, as I’d read several blog posts on the subject and most require many manual steps having to be repeated on each node, and since I value repeatable processes I enjoyed the challenge of figuring it out.
I’m assuming a certain level of knowledge for readers of this post, so I’m not spelling out every step needed.
There are many posts on the internet which do a much better job of explaining things; for example, checkout this post Make Ubuntu server 20.04 boot from an SSD on Raspberry Pi 4 by Zakaria Smahi.
Inventory
First off, the inventory of components I am using:
Hardware
Since the Raspberry Pi 4 supports booting off an external drive via USB, I only purchased one SD Card, which will be needed to boot each Pi in order to enable booting from USB.
I’m planning to run Kubernetes on my cluster, so it is recommended to run off Solid State Drives as Kubernetes is disk heavy and the performance and lifetime of SSD’s is considerably better than that of an SD card.
EDIT: I had to update the firmware of the SSD drive enclosures to solve a slow boot issue. The updated firmware can be found on the Sabrent website and seaching for the EC-UASP model. I had to use a Windows computer to perform the firmware update.
Disk Images
Steps
I followed these steps to setup my cluster from my Ubuntu laptop.
Enabling USB Boot
Booting the Raspberry Pi off USB isn’t enabled by default; enabling requires changing the boot order to first attempt USB followed by the SD card.
Flash the SD card with the Raspberry Pi OS Lite operating system. This article explains how to install the Raspberry Pi operating system image on an SD card.
SSH needs to be enabled so headless installation is possible. After flashing the SD card, mount it and create an empty file called ssh in the “boot” partition. Unmount and eject the SD card when done.
Insert the SD card into the first Raspberry Pi node and switch it on.
Figure out it’s IP address and connect via SSH from your PC. I used nmap 192.168.0.1-254 to figure out the IP address; given my home network is in the 192.168.0.x range, I limited the search to addresses between 1 and 254.
$ nmap 192.168.0.1-254

Starting Nmap 7.80 ( https://nmap.org ) at 2020-12-22 17:21 GMT

...

Nmap scan report for raspberrypi (192.168.0.76)
Host is up (0.0094s latency).
Not shown: 997 closed ports
PORT    STATE SERVICE
22/tcp  open  ssh

...
In my case, the IP was 192.168.0.76 and the default username is pi and password is raspberry.
$ ssh pi@192.168.0.76
The authenticity of host '192.168.0.76 (192.168.0.76)' can't be established.
ECDSA key fingerprint is SHA256:XxXxXXXxxx/ZZzyyyzZZZxxxXXxyyYYYZZzZzZZxxYy.
Are you sure you want to continue connecting (yes/no/[fingerprint])? yes
Warning: Permanently added '192.168.0.76' (ECDSA) to the list of known hosts.
pi@192.168.0.76's password:
Linux raspberrypi 5.10.0-v7l+ #1382 SMP Tue Dec 15 18:23:34 GMT 2020 armv7l

The programs included with the Debian GNU/Linux system are free software;
the exact distribution terms for each program are described in the
individual files in /usr/share/doc/*/copyright.

Debian GNU/Linux comes with ABSOLUTELY NO WARRANTY, to the extent
permitted by applicable law.
Last login: Tue Dec 22 18:57:21 2020

SSH is enabled and the default password for the 'pi' user has not been changed.
This is a security risk - please login as the 'pi' user and type 'passwd' to set a new password.

Wi-Fi is currently blocked by rfkill.
Use raspi-config to set the country before use.

pi@raspberrypi:~ $
Once you have an SSH terminal onto to first Raspberry Pi node you can configure the boot order.
See Raspberry Pi 4 bootloader configuration for how it is done.
Or use the raspi-config utility to configure via the console user-interface.
Power off the node, running sudo poweroff, remove the SD card and repeat these steps for each of the nodes.
Provisioning Ubuntu
The following configuration files and scripts are required to provision the SSD drive for each Raspberry Pi node.
Create a directory on your PC and create each file with the following content, or clone this gist
-
usercfg.txt
[pi4]
max_framebuffers=2
gpu_mem=16
boot_delay
dtoverlay=vc4-fkms-v3d
kernel=vmlinux
initramfs initrd.img followkernel
-
user-data
#cloud-config

hostname: HOSTNAME
manage_etc_hosts: true

groups:
  - k8s

users:
  - name: k8s
    gecos: Kubernetes
    passwd: "PASSWORD_HASH"
    lock_passwd: false
    primary_group: k8s
    groups: [adm, audio, cdrom, dialout, dip, floppy, lxd, netdev, plugdev, sudo, videom, k8s]
    sudo: ["ALL=(ALL) NOPASSWD:ALL"]
    shell: /bin/bash
    ssh_authorized_keys:
      - "SSH_AUTHORIZED_KEY"

ssh_pwauth: false

package_update: true
package_upgrade: true
-
network-config
My home network is on 192.168.0.*, but you may need to change the range for your network.
version: 2
ethernets:
  eth0:
    dhcp4: false
    optional: true
    addresses: [192.168.0.IPSUFFIX/24]
    gateway4: 192.168.0.1
    nameservers:
      search: [home]
      addresses: [8.8.8.8]
-
auto_decompress_kernel
#!/bin/bash -e

# set variables
BTPATH=/boot/firmware
CKPATH=$BTPATH/vmlinuz
DKPATH=$BTPATH/vmlinux

# check if compression needs to be done
if [ -e $BTPATH/check.md5 ]; then
  if md5sum --status --ignore-missing -c $BTPATH/check.md5; then
    echo -e "\e[32mFiles have not changed, decompression not needed\e[0m"
    exit 0
  else
    echo -e "\e[31mHash failed, kernel will be decompressed\e[0m"
  fi
fi

# backup the old decompressed kernel
mv $DKPATH $DKPATH.bak

if [ ! $? == 0 ]; then
  echo -e "\e[31mDECOMPRESSED KERNEL BACKUP FAILED!\e[0m"
  exit 1
else
  echo -e "\e[32mDecompressed kernel backup was successful\e[0m"
fi

# decompress the new kernel
echo "Decompressing kernel: "$CKPATH"..."

zcat $CKPATH > $DKPATH

if [ ! $? == 0 ]; then
  echo -e "\e[31mKERNEL FAILED TO DECOMPRESS!\e[0m"
  exit 1
else
  echo -e "\e[32mKernel decompressed succesfully\e[0m"
fi

# hash the new kernel for checking
md5sum $CKPATH $DKPATH > $BTPATH/check.md5

if [ ! $? == 0 ]; then
  echo -e "\e[31mMD5 GENERATION FAILED!\e[0m"
else
  echo -e "\e[32mMD5 generated succesfully\e[0m"
fi

exit 0
-
999_decompress_rpi_kernel
DPkg::Post-Invoke {"/bin/bash /boot/firmware/auto_decompress_kernel"; };
-
provision
NB: Make this file executable. I.e. chmod +x provision.
#!/bin/bash -e

if [[ $EUID -ne 0 ]]; then
   echo "Error: This script must be run as root"
   exit 1
fi

if [ -z $1 ] || [ -z $2 ] || [ -z $3 ]; then
  echo "Usage: provision <device> <hostname> <ip-suffix>"
  exit 1
fi

DEV=$1
HOSTNAME=$2
IPSUFFIX=$3

IMAGE=${IMAGE:-ubuntu-20.04.1-preinstalled-server-arm64+raspi.img.xz}
PASSWORD=${PASSWORD:-p@ssw0rD}

PASSWORD_HASH=$(mkpasswd --method=SHA-512 --rounds=4096 "$PASSWORD")
SSH_AUTHORIZED_KEY=$(<~/.ssh/id_rsa.pub)

if [ -z "$SKIP_FLASH" ];
then
  echo "Writing image to /dev/$DEV"
  time xzcat $IMAGE | dd of=/dev/$DEV bs=1M
fi

sync

echo "Mounting /dev/$DEV"

BOOT_VOL=mnt/boot
ROOT_VOL=mnt/rootfs

mkdir -p $BOOT_VOL $ROOT_VOL
mount /dev/${DEV}1 $BOOT_VOL
mount /dev/${DEV}2 $ROOT_VOL

# copy user boot configuration
cp usercfg.txt $BOOT_VOL/

# decompress kernel
zcat $BOOT_VOL/vmlinuz > $BOOT_VOL/vmlinux

# add script to automatically decompress kernel on apt install/upgrade
cp auto_decompress_kernel $BOOT_VOL/
cp 999_decompress_rpi_kernel $ROOT_VOL/etc/apt/apt.conf.d/

# insert cgroup configurations
sed -i "s/rootwait/rootwait cgroup_enable=cpuset cgroup_enable=memory cgroup_memory=1/g" $BOOT_VOL/cmdline.txt

# user-data for cloud init
cp user-data $BOOT_VOL/
sed -i "s/HOSTNAME/${HOSTNAME}/g" $BOOT_VOL/user-data
sed -i "s|PASSWORD_HASH|${PASSWORD_HASH}|g" $BOOT_VOL/user-data
sed -i "s|SSH_AUTHORIZED_KEY|${SSH_AUTHORIZED_KEY}|g" $BOOT_VOL/user-data

# networking
cp network-config $BOOT_VOL/
sed -i "s/IPSUFFIX/${IPSUFFIX}/g" $BOOT_VOL/network-config

sync

sleep 2

echo "Unmounting /dev/$DEV"

umount $BOOT_VOL
umount $ROOT_VOL

exit 0
Make sure you have downloaded the Ubuntu disk image file from requirements above, and placed it in the same directory as the provision script, so your file layout should look like:
$ tree
.
├── 999_decompress_rpi_kernel
├── auto_decompress_kernel
├── network-config
├── provision
├── ubuntu-20.04.1-preinstalled-server-arm64+raspi.img.xz
├── user-data
└── usercfg.txt

0 directories, 7 files
VERY IMPORTANT!
After inserting the SSD drive you will need to figure out it’s block device name using lsblk, since the provision script will flash the SSD with the Ubuntu image, so you must be sure you have the correct device name.
For example, on my computer it is sdb but it might be different for you!
You can use lsblk to figure out which device name is correct.
$ lsblk

NAME                   MAJ:MIN RM   SIZE RO TYPE  MOUNTPOINT
loop0                    7:0    0 146.6M  1 loop  /snap/code/51
loop1                    7:1    0 143.8M  1 loop  /snap/code/52
...
sda                      8:0    0 238.5G  0 disk
├─sda1                   8:1    0   487M  0 part  /boot
├─sda2                   8:2    0     1K  0 part
└─sda5                   8:5    0   238G  0 part
  └─sda5_crypt         253:0    0   238G  0 crypt
    ├─ubuntu--vg-root  253:1    0   230G  0 lvm   /
    └─ubuntu--vg-swap_1
sdb                     11:0    0 128.0G  0 disk
...
The provision script requires providing the block device name, hostname for the node and the IP suffix.
I am going to have a 4 node Raspberry Pi cluster running Kubernetes, so I settled on host naming convention of rpi-k8s-<role>-<number> for my nodes, where <role> is the role of the node; either “server” or “agent”; and <number> is the instance number; starting from 001 to 999.
I decided to have my server node have the IP 192.168.0.100, followed by 192.168.0.101, 192.168.0.102 and 192.168.0.103 for each agent node.
Note: The Ubuntu image filename and password can be overridden by setting the IMAGE and PASSWORD environment variables before running the provision script.
E.g.
export IMAGE=ubuntu-20.04.1-preinstalled-server-arm64+raspi.img.xz
export PASSWORD=p@ssw0rD
Run the provision script with the following arguments for the server node:
./provision sbd rpi-k8s-server-001 100
I intend to run an HA server in future, so having the number 001 for the first server node makes it consistent for when I add the second server with 002.
And then for each agent node (inserting and ejecting each respective SSD in between):
./provision sbd rpi-k8s-agent-001 101
./provision sbd rpi-k8s-agent-002 102
./provision sbd rpi-k8s-agent-003 103
Finally, connect the SSD drives to each Raspberry Pi node and power them on.
Each node will automatically provision itself and after some time, you will be able to SSH onto them using the k8s user.
E.g.
ssh k8s@192.168.0.100
ssh k8s@192.168.0.101
ssh k8s@192.168.0.102
ssh k8s@192.168.0.103
Next, I’ll write a post on installing Kubernetes on the cluster.
02 Aug 2020
ldhdns
virtualstaticvoid/ldhdns
A developer tool for providing DNS for Docker containers running on a local development host.
Eventinator
virtualstaticvoid/eventinator
A prototype project to try out NATS Streaming via a gRPC service, using streaming request/response for publishing
and subscribing to messages in golang.
NATS Streaming Demo
virtualstaticvoid/nats_cluster
Demonstrates running a 6 node NATS and STAN (streaming) cluster using docker-compose.
26 Apr 2020
Installing and managing the latest version of a command line tool can be a pain and very time consuming.
As developers we typically want to use the latest and greatest version of a tool before it becomes more widely
available via official deployment channels, such as deb or snap on Linux and homebrew on Mac.
Luckily, there is a simple version manager, asdf, which makes life very easy with it’s plugin capabilities.
There are many plugins provided by the community, including for:
- DotNet Core
- Crystal
- GitHub CLI
- Helm
- kubectx
- …
And, creating plugins is easy. You need 3 shell scripts, namely:
bin/list-all - lists all installable versionsbin/download - download source code or binary for the specified versionbin/install - installs the specified version
See the official documentation for more details.
I spend a fair amount of time doing technical research, so often times there isn’t a distribution of the command line tool
I’m testing out, so I usually resort to spending 10 to 15 minutes whipping up an asdf plugin for the given tool.
This involves creating a new repository on GitHub, from the asdf-plugin-template and then editing the
lib/utils.bash file, providing the plugin name and GitHub repo URL of the tool in question.
Here are some of the plugins I’ve created:
asdf-aws-vault - AWS Vault is a tool to securely store and access AWS credentials in a development environment.asdf-devspace - DevSpace is the next-generation tool for fast cloud-native software development.asdf-docker-compose - Compose is a tool for defining and running multi-container Docker applications.asdf-docker-machine - Machine lets you create Docker hosts on your computer, on cloud providers, and inside your own data center.asdf-glooctl - Gloo is a feature-rich, Kubernetes-native ingress controller, and next-generation API gateway.asdf-grv - GRV is a terminal interface for viewing git repositories.asdf-helm - Helm is the best way to find, share, and use software built for Kubernetes.asdf-istioctl - Istio configuration command line utility for service operators to debug and diagnose their Istio mesh.asdf-k9s - Kubernetes CLI to manage your clusters in style.asdf-kubebuilder - SDK for building Kubernetes APIs using CRDs.asdf-kubectx - Faster way to switch between clusters and namespaces in kubectl.asdf-skaffold - For easy and repeatable Kubernetes development.asdf-sonarscanner - SonarScanner is the scanner to use when there is no specific scanner for your build system.asdf-tilt - A multi-service dev environment for teams on Kubernetes.
22 Nov 2018
Ruby on Rails
Taskinator
virtualstaticvoid/taskinator
A simple orchestration library for running complex processes or workflows in Ruby. Processes are defined
using a simple DSL, where the sequences and tasks are defined. Processes can then be queued for execution.
Sequences can be synchronous or asynchronous, and the overall process can be monitored for completion or failure.
Riveter
[virtualstaticvoid/riveter][riveter]
Provides several useful patterns, packaged in a gem, for use in Rails and other web based applications,
including generators to help improve consistency in your applications.
Rails Simple Config
virtualstaticvoid/rails_simple_config
A simple YAML based configuration for Ruby on Rails 3+, which supports shared settings, ERB and more.
Easy Enumerated Type
virtualstaticvoid/ez_enum
Provides a simple abstraction for defining enumerations in a Ruby module. Supports listing members and
localization of constant names.